Introduction
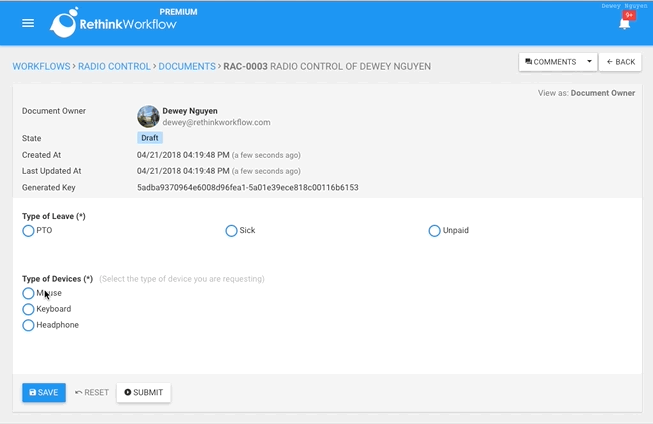
Radios Control allows capturing one selection among a set of options.Features
- Allow defining the list of available options when designing the form
- Set one option to be the default option
- Control the number of options (1 to 4) to be displayed per line
- Using an internal or external data list as the source to populate the list of available options. This functionality is available in Advanced and Ultimate plan.
- All of the other standard functionalities of a field in Rethink Workflow
- Provide placeholders to be used in the workflow including:
value: The value of the selected radioname: The name (or label) of the selected radio
How to design
To add the radios control to your form, simply drag and drop it from the control panel to the form-design area.
 To adjust the properties specifically for radios, click on OPTIONS tab on the properties panel below the control.


To use an internal data list as the source, the workflow designer can follow these steps:Specify the Number of Options per line
The radios control allows specifying the number of options per line. The minimum number of options per line is one (1) and the maximum number of options per line is four (4). To use this setting, click on GENERAL tab and adjust "How many options per line?"

Define Options
There are three ways to define the options for the end-user to select from: defined inline, using an internal data list, and using an external data list. The later two options in Advanced and Ultimate plan.
Define Options Inline
The simplest way to specify the list of available options is defining it inline. This method allows the workflow designer to manage the list of available options in the property panel.

While adding options, you can specify the default value for this field by clicking on the radio at the beginning of each option. Note that only one option can be selected as the default one.
Using an internal data list
The workflow designer can also use an internal data list as the source of the options. The advantages of using a data list are:
- The list of available options can be managed via data list interface.
- The list of available options can be shared across workflows
TIP If there are many rows in the data list, Radios Control will display them all on the form, therefore, making the form longer. In that case, you might want to use a drop-down control instead.
Click here to learn more about how to create and manage data list1. Select "Using an internal data list." option.
2. Select the desired data list from "Data List" drop-down

3. Select a column to be used as the value of the radios
4. Select a column to be used as the name of the radios
5. Optionally, select an option to be selected as the default

Using an external data list
Similar to using an internal data list, the workflow design can also use an external data list as the source of the radios control. The external data list must return the list of available options in JSONP format. An example of external data list can be found here: https://jsonplaceholder.typicode.com/posts
To use an external data list as the source, the workflow designer can follow these steps:
1. Select "Using an external data list." option.
2. Enter the absolute URL of the data list
3. Select a column to be used as the value of the radios
4. Select a column to be used as the name of the radios
5. Optionally, select an option to be selected as the default

How to use
The animation below demonstrates how the end-user interact with a radios control.


Using the radios field in reporting
Include the radios field in column
To include a radios field in the list of columns of the report, click COLUMNS button and select it field from the popup:

To export the radio values, click on EXPORT button and select the desired formats. The radios field provides the following attributes:

To export the radio values, click on EXPORT button and select the desired formats. The radios field provides the following attributes:
value: the selected radio valuename: the selected radio name (or label)
Filter documents using the radios field
To filter documents using the radio field, click on FILTERS and select it from the list of filters. On the address filter popup, select the values for filtering.


No comments:
Post a Comment
Note: Only a member of this blog may post a comment.